Likewise, the Settings and Start menu have also undergone a complete overhaul. All in all, there are a plethora of things to look forward to in the latest OS releases. Apart from all these, Microsoft has also baked in a few easter eggs and hidden features to this offering. For example, the ability to bring up a telephone dialer (Windows+R then dialer.exe) or the inability to name a folder PRN, AUX, or NUL are some of its hidden tweaks. But while most of them are just for the sake of enjoyment, there’s one that could actually prove to be quite beneficial. Yes, we are talking about the God Mode! So what exactly is this, and more importantly, how could you enable God Mode in Windows 11? Well, in this guide, we will be addressing all these queries. So without any further ado, let’s get started.
What is God Mode in Windows?
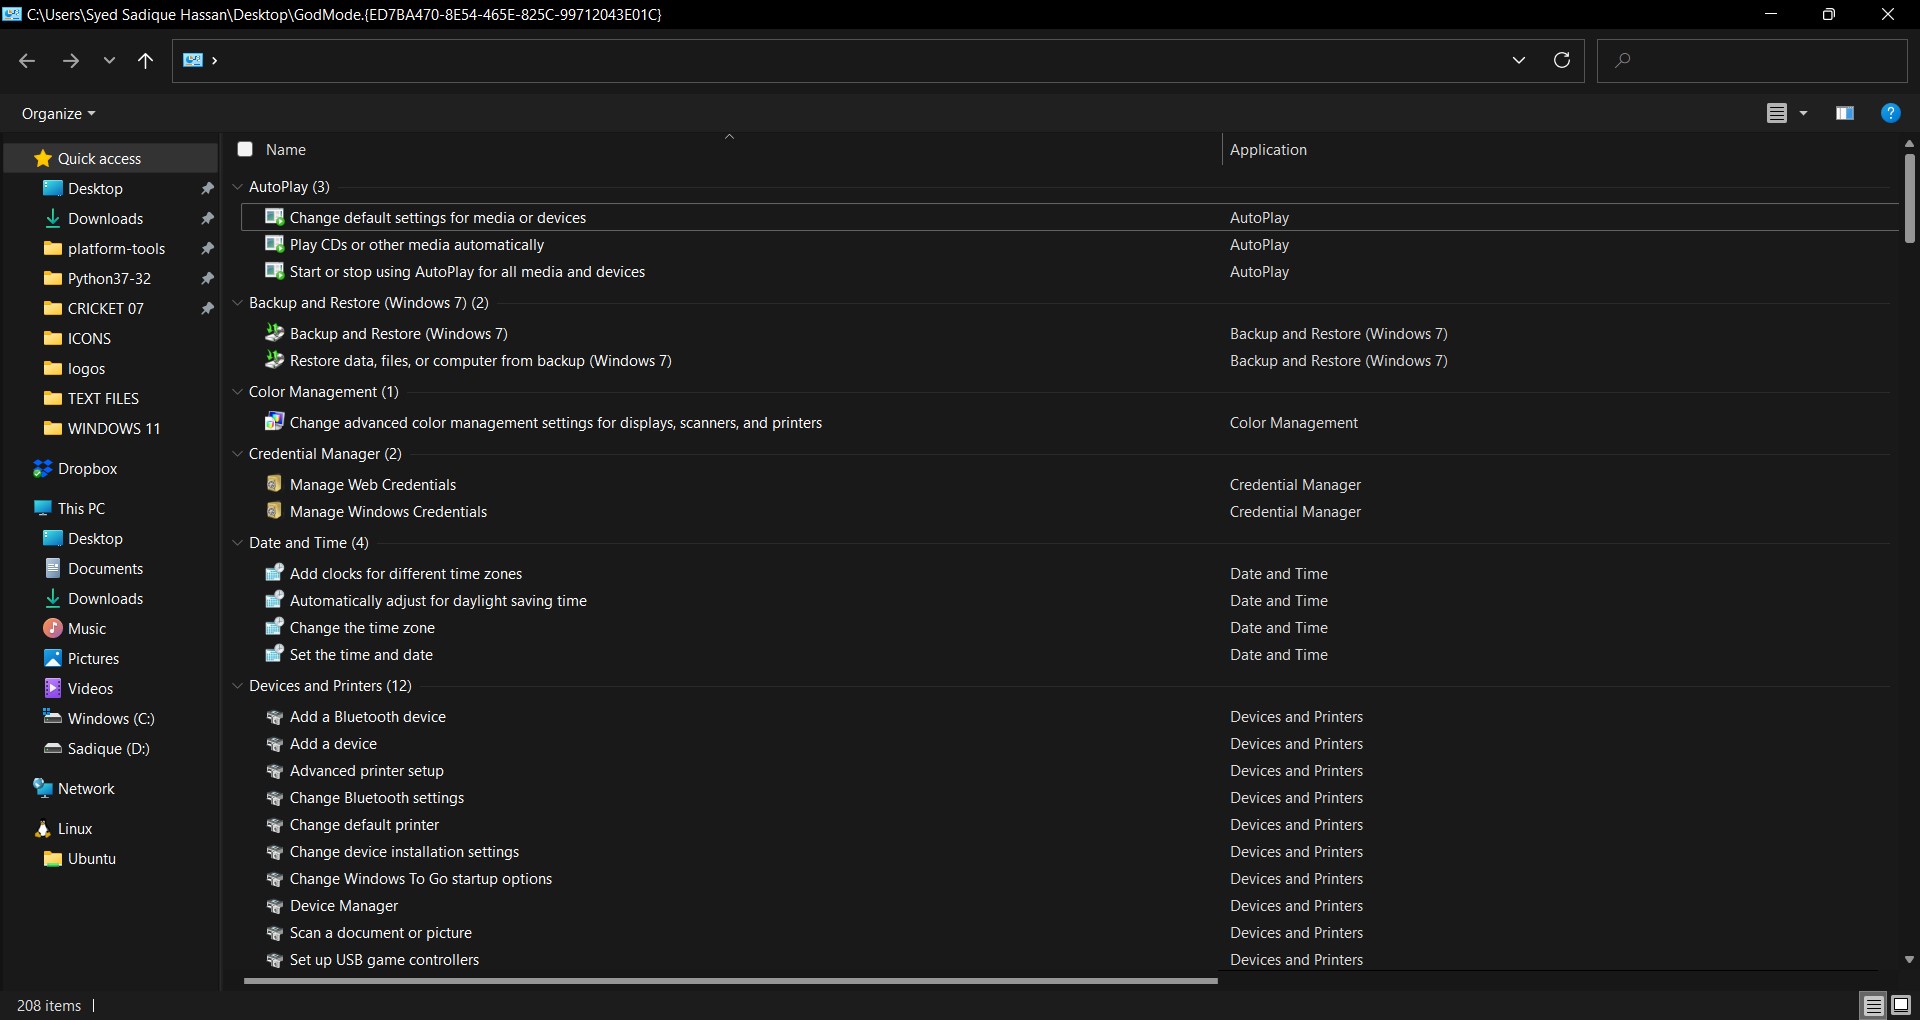
God Mode is a centralized place for all the Control Panel apps, settings, and modules. With over 32 different categories, this mode houses over 250 other tools and features. These include the likes of Administrative Tools, Devices Settings, Internet Options, Programs, and Features, Security And Maintenance, Troubleshooting, User Accounts, among others. All in all, you could call the God Mode a one-stop place for all the Windows Administrative Settings. But was there really a need for this feature? Yes, and here’s why.
The Benefit of Windows 11 God Mode in Windows
With a plentitude of options already baked into the Control Panel, it becomes all the more challenging task in finding the desired setting. While you could use the search functionality for this purpose, but the indexing itself takes ages to complete and could, in turn, slow down your PC. Furthermore, now that Microsoft has depreciated the Control Panel option from the Windows context menu (Windows+X), the steps to get hold of the desired setting only get lengthier. Fortunately, to counter all these issues, you have the divine blessings, aka the ability to enable God Mode in Windows 11!
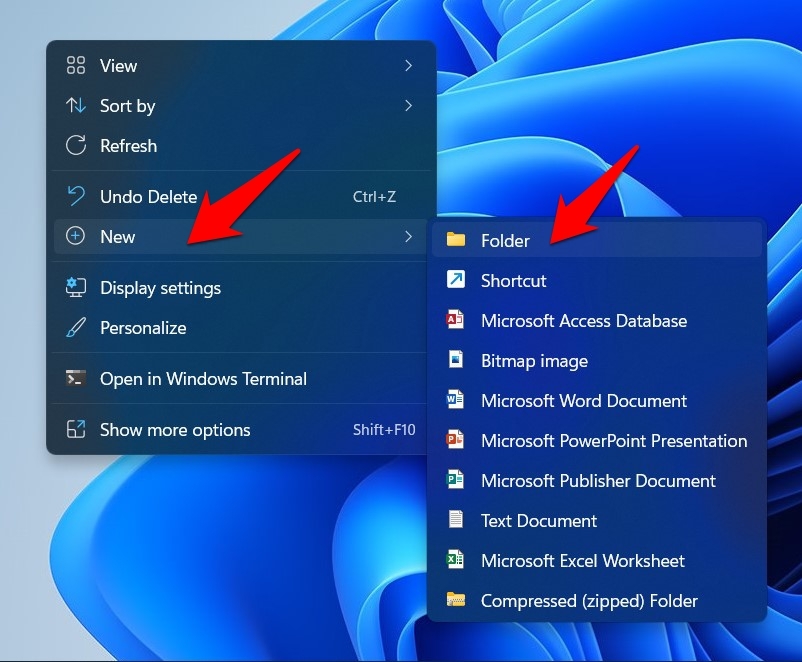
How to Enable God Mode in Windows 11?
How to Use God Mode in Windows 11?
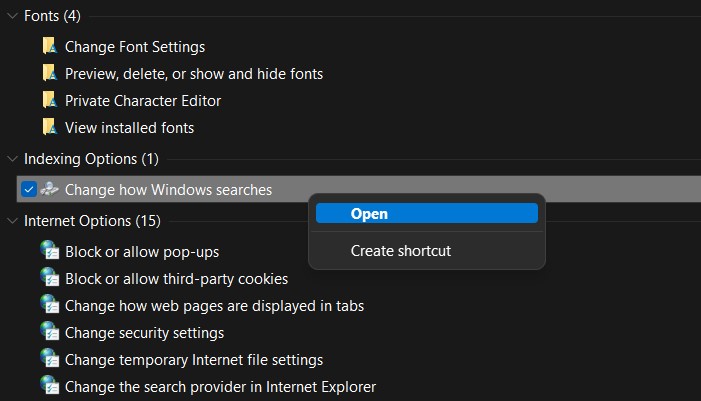
Once you have enabled the God Mode, simply double-click on its icon to launch it. You will now get all the Control Panel applets right in front of you. Just double-click on the desired one that you wish to use. You could also right-click on it and select Open to launch that setting.
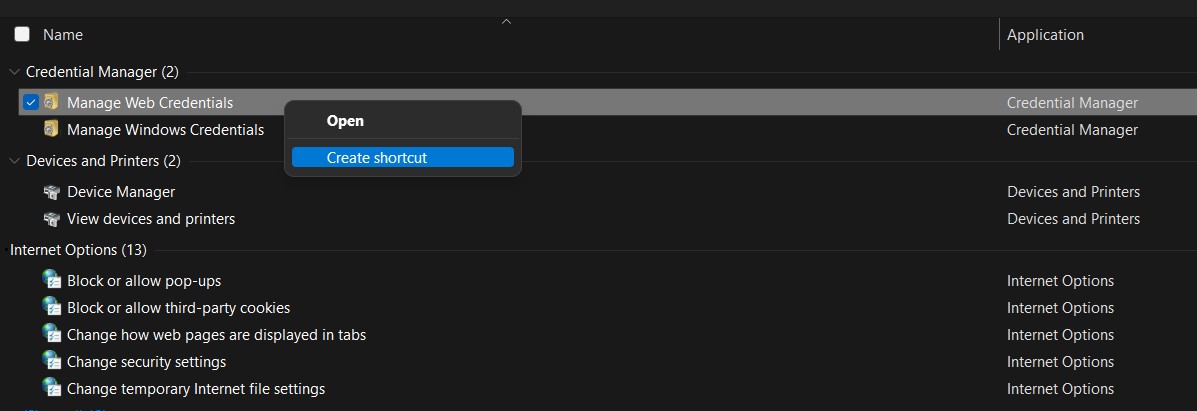
Moreover, if you are planning to use a feature regularly, then you could create its Desktop shortcut as well. For that, just right-click on it and select the Create shortcut” option.
You will now get a prompt asking if the shortcut needs to be created on the desktop. Click Yes to reply in the affirmative.
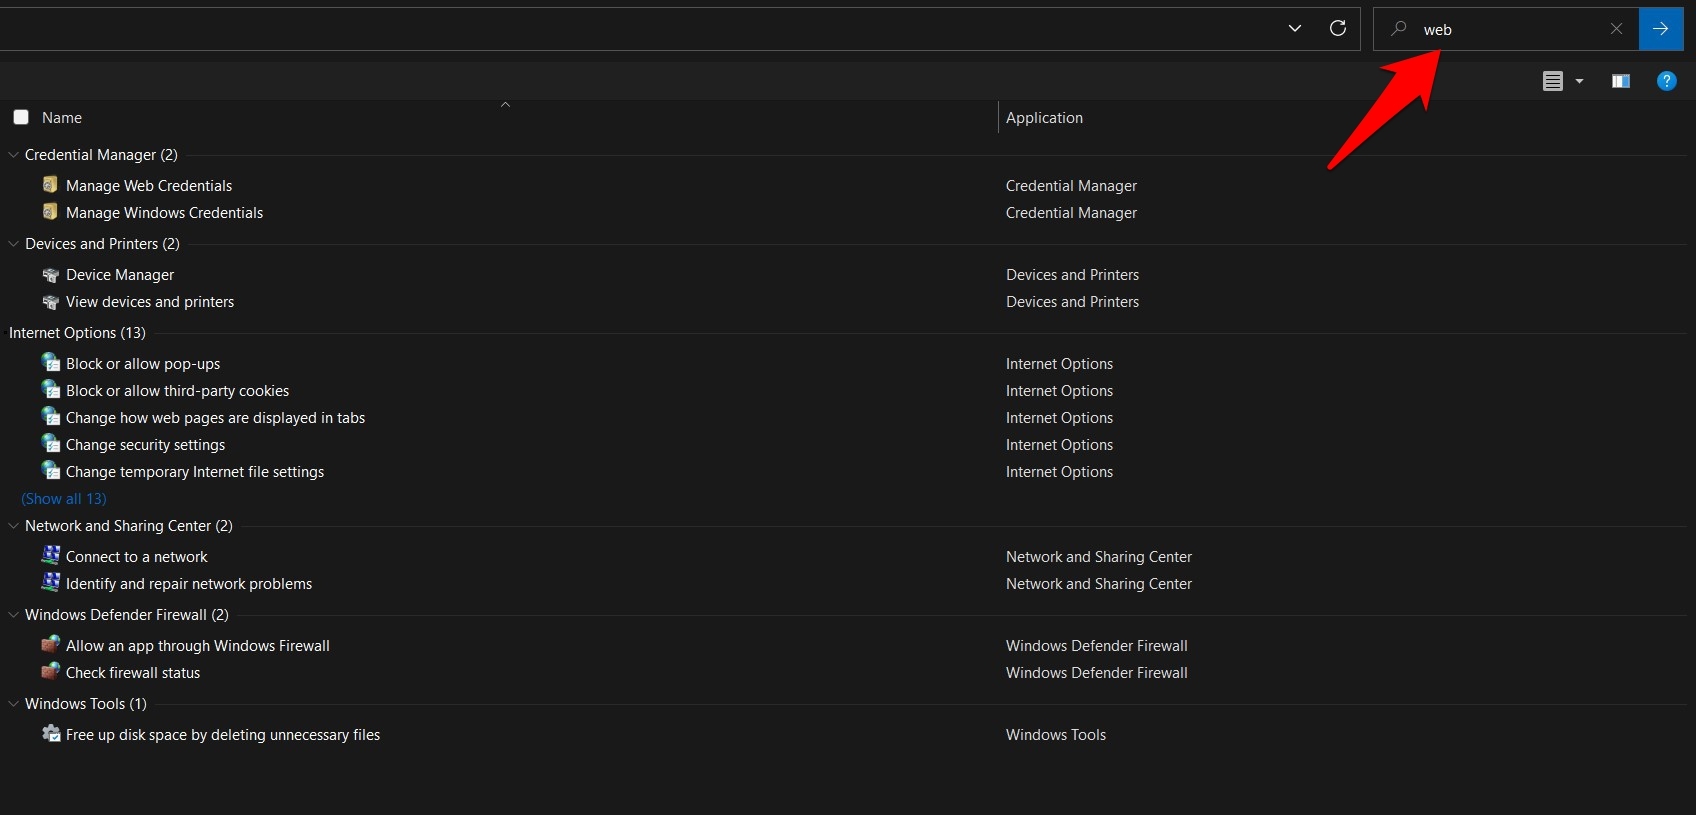
Likewise, there’s a search bar present at the top right, which you could use to find the desired module of your choice.
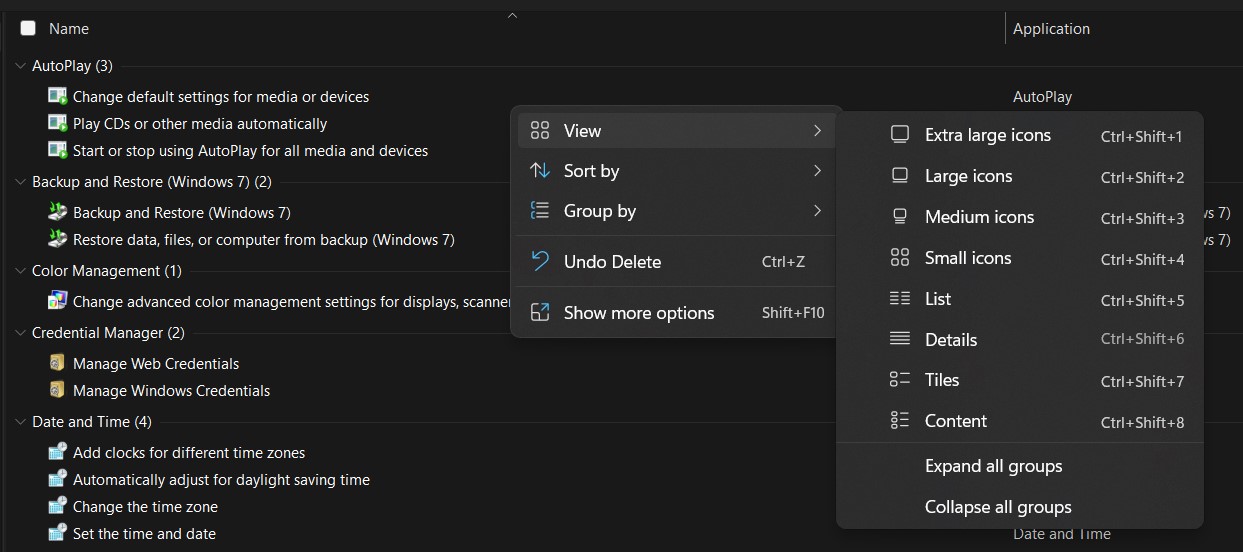
For ease of usage, you also consider increasing the size of the icons, sorting them in an alphabetical manner, or grouping together all the similar ones. All these could be carried out by performing a right-click inside the God Mode and then selecting the View, Sort By, and Group By options.
How to Disable God Mode in Windows 11?
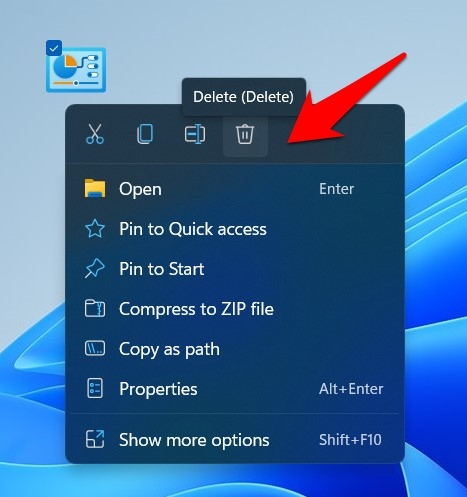
If you are done using the God Mode, and it’s time to bid it adieu, just delete the God Mode icon from the Desktop, and the feature stands disabled. So select the God Mode icon and hit the Del Key (or perform a right-click > Delete) to remove it from your desktop. You could also use the Shift+delete shortcut keys to delete this permanently.
Concluding Remarks
With this, we round off the guide on how you could enable God Mode in Windows 11. Likewise, we have also listed out the benefits of this mode, all the settings that it beholds, and its usage instructions. What are your views about this hidden Windows feature? Do let us know in the comments section below. If you’ve any thoughts on How to Enable and Use God Mode in Windows 11?, then feel free to drop in below comment box. Also, please subscribe to our DigitBin YouTube channel for videos tutorials. Cheers!
